After creating a pivot, you can use the paw print menu to conduct further analysis of the pivot data, create selections from the pivot, add pages for filtered views, or export the data.
Pivot analysis options - paw print menu
To carry out further analysis on pivot data:
-
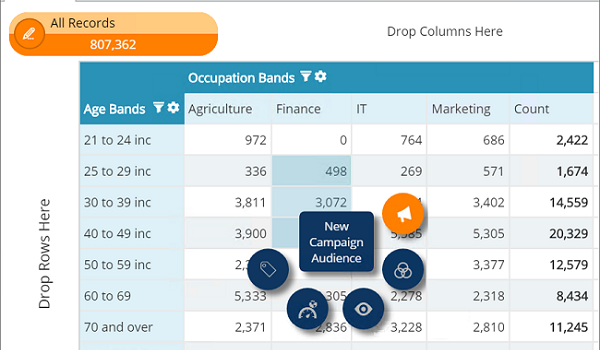
Select a pivot cell value and right click to display the paw print menu. You can also select multiple cells by holding down the Ctrl key whilst making your selection.
-
Select an option from the menu. Clockwise, these options are:
-
New Campaign Audience - create a new campaign audience from the selection.
-
New Venn – use the selection as a new data set in a Venn diagram.
-
New Selection – create a new selection from the data.
-
New Map Report – generate a new map report.
-
Export to tag – export selection to a new tag.
-
Create a selection from a pivot chart view
By default, a pivot displays as a table but there are further graphical options for visual analysis. Select the chart tab to view the pivot as a selection of charts.
To make a selection from a chart:
-
Select the section of interest. Multiple sections can be selected simultaneously by holding down the Ctrl button.
-
Drag it to the tab bar at the bottom of the screen. A selection window containing your data will open in editor view.
Note: you also have the ability to apply further filters to your analysis chart by selecting the criteria cogs before making your selection.
Adding pages to a pivot
To add additional pages for a filtered view of the all records initial page:
-
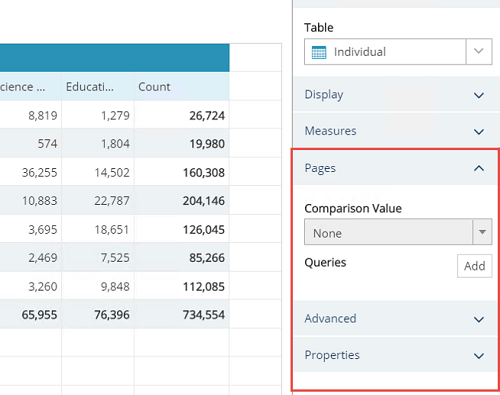
Expand the pages menu in the pivot properties pane.
-
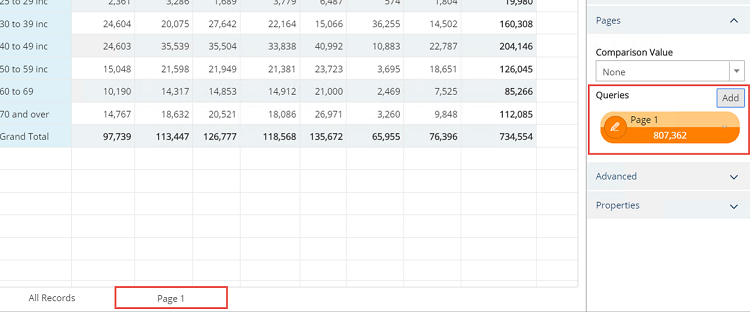
Click the add button to produce a new tab and query lozenge for incorporation of the page filter query.
-
Set your comparison values as required:
-
Difference - for each filtered page against the all records page to be compared (to show a positive or negative differences in count volumes).
-
Index - for setting a base 0 to the all records page and displaying of the under-representation or over-representation of each corresponding pivot cell. Any value over 0 equals over-representation and under 0 equals under-representation.
-
Exporting a pivot
You can manually export pivot data to a channel (e.g. an FTP or folder location) or set an export schedule, providing you with flexibility in their data management activities.
Note: Both export methods require a pre-existing channel at the same table level as the pivot data. If there are no channels available in the dropdown menu, contact your server administrator to configure one.
When configuring the export channel, a file path for the exported data is created. When data is exported, either via a manual or scheduled export, the information within the pivot table is saved to this location for users to access outside of Engage.
Note: Only measures created from fields/expressions are exported; derived fields configured within the editor pane as part of the pivot are not available for export.
The created file is an export of the raw data, and may need to be formatted with another tool.
Manually export pivot data
-
Open the pivot table to be exported.
-
Expand the Export Options in the properties pane and select the export channel.
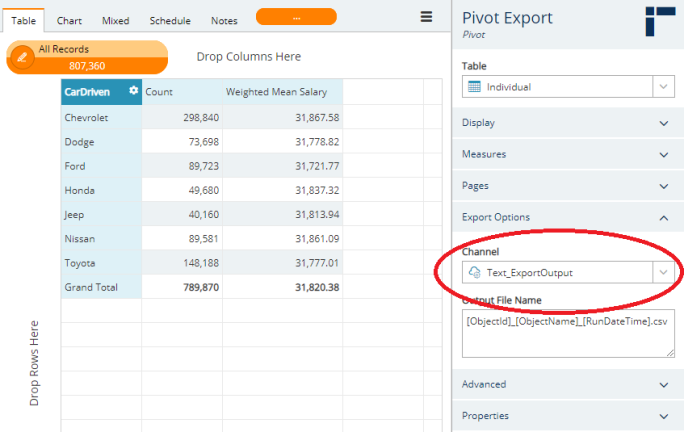
Note: The Headers In First Row property should be enabled to ensure the export contains the X-axis titles.
-
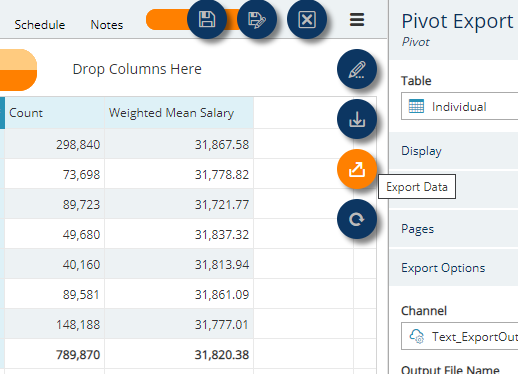
Expand the hamburger menu and select Export Data.
-
The pivot data is exported to the location defined by the export channel during configuration.
Schedule a pivot data export
-
Open the pivot table to be exported.
-
Expand the Export Options in the properties pane and select the export channel.
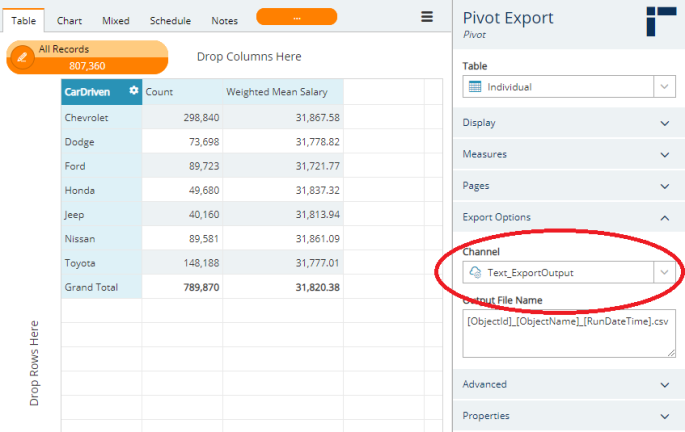
Note: The Headers In First Row property should be enabled to ensure the export contains the X-axis titles.
-
On the Schedule tab, open the Edit dropdown menu and select Add Schedule Item.
-
Use the dropdown menus in the pop-up window to configure the schedule.
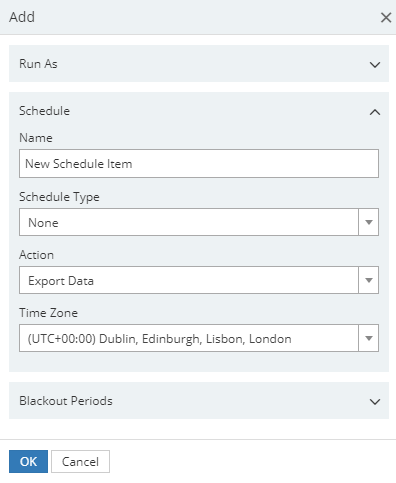
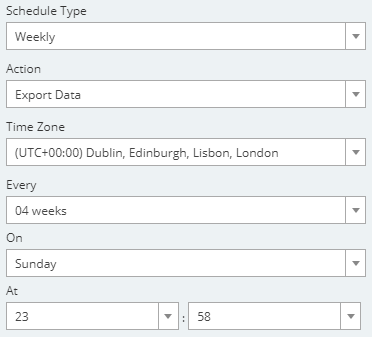
Depending on the Schedule Type selected, additional menus will become available, e.g. selecting a weekly schedule will enable menus to select the frequency, day and time of the export.
-
Click OK to confirm changes and create the scheduled export.
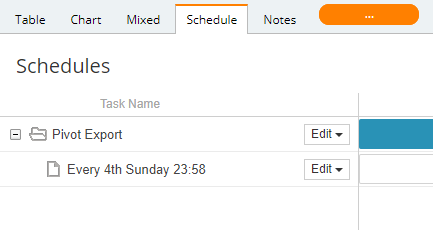
Note: It is possible to schedule multiple exports by repeating this process.